A bathroom remodel ranks among the highest-ROI home improvement projects, both financially and in daily quality of life. Whether you’re updating a tired 1980s tile scheme or modernizing fixtures, a well-planned remodel transforms one of your home’s most-used spaces. The key isn’t just picking trendy fixtures: it’s approaching the project systematically, from budgeting and permits through plumbing rough-ins and final trim. This guide walks you through each phase of how to remodel a bathroom, helping you avoid costly mistakes and stay on timeline.
Table of Contents
ToggleKey Takeaways
- Set a realistic budget of $5,000–$25,000+ and include a 15–20% contingency for unexpected issues like rotted framing or hidden plumbing that typically emerge during demolition.
- A bathroom remodel timeline ranges from 2–3 weeks for cosmetic updates to 4–8 weeks for plumbing relocations and structural work, plus time for permits and inspections.
- Prioritize structural repairs first (mold, soft subfloors, failing grout), then plumbing and electrical upgrades that require permits, and cosmetic changes last.
- Always secure permits before starting plumbing relocation or electrical work—inspectors catch code violations that prevent fires, leaks, and system failures.
- Proper ventilation with an 80–110 CFM exhaust fan is essential to remove humidity and prevent mold in bathroom spaces.
- Use cement board instead of drywall in wet areas, maintain proper drain slope (1/4 inch per foot), and install GFCI protection on all outlets within 6 feet of water sources.
Plan Your Bathroom Remodel Before You Begin
Set Your Budget and Timeline
Set a realistic budget before ordering a single tile. Most bathroom remodels range from $5,000 (modest updates) to $25,000+ (full overhauls with structural changes), but your actual cost depends on scope, finish levels, and your location. Start by asking: Are you replacing just fixtures and finishes, or moving plumbing? Is the existing subfloor solid, or does it need repair? Build in a 15–20% contingency for surprises, rotted framing, outdated wiring, or hidden plumbing issues almost always surface once walls come down.
Timeline varies by complexity. A cosmetic refresh (new vanity, fixtures, paint, flooring) might take 2–3 weeks. Moving a toilet or shower requires rough plumbing, inspections, and tile work, easily stretching to 4–8 weeks. If you’re tackling this solo in evenings and weekends, plan for longer. Waiting for permits, inspections, and material delivery adds time too.
Assess Your Current Space and Identify Priorities
Measure your bathroom and note existing infrastructure. Grab a tape measure, note wall lengths, ceiling height, window and door placement, and the location of plumbing stacks (the vertical pipes behind walls). Take photos. Identify what’s staying and what’s changing.
Prioritize based on function and condition. Structural issues (soft subfloor, mold, failing grout) come first. Then ask: Will you keep the existing shower/tub location, or relocate it? Moving plumbing is expensive and permit-heavy: relocating a toilet two feet or a shower six feet adds complexity. Cosmetic changes, paint, hardware, mirror, come last. A design resource like Houzz’s bathroom remodel workbook can help you clarify your vision and understand design flow before investing.
Essential Preparation and Demolition
Turn off water and electrical power to the bathroom at the main panel or shut-off valve. If you’re inexperienced with breaker panels, hire a licensed electrician to safely isolate circuits. Shutting off power prevents accidental shock: shutting off water prevents flooding.
Remove old fixtures in reverse order of installation. Drain the toilet, disconnect its bolts and water supply, then lift it away. Unscrew the vanity and disconnect its supply lines and drain. If there’s a tub or shower, shut its drain gate and remove caulk and fasteners. Label and bag all fasteners, some may match new fixtures.
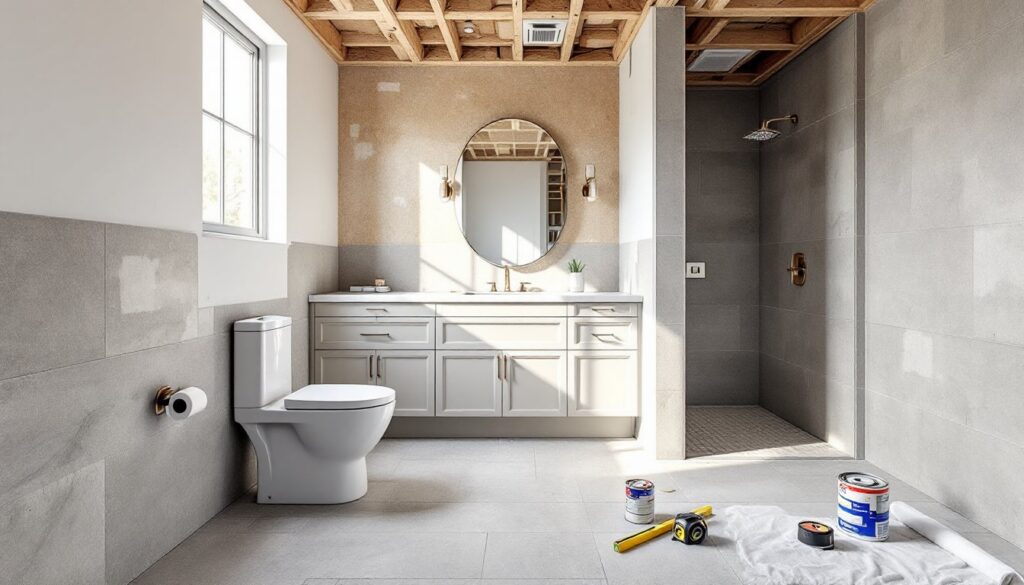
Once fixtures are out, demo surfaces carefully. Wear a dust mask (N95 or better), safety glasses, and gloves throughout: old tile, grout, and drywall generate silica dust and harbor mold. If your home was built pre-1980, assume lead paint exists, hire a lead abatement professional rather than sanding old paint yourself. Use a pry bar and hammer to remove tile or old vanity, working methodically section by section. Don’t rush: you may need intact drywall or subfloor underneath.
Inspect the exposed framing and subfloor. Look for soft spots (sign of water damage), mold, or rotted wood. If joists or rim boards are compromised, sister in new lumber and let a structural engineer assess load-bearing repairs. Patch any holes in drywall with cement board (not regular drywall) in wet areas like above a tub. Cement board resists moisture and provides a stable tile substrate.
Update Plumbing and Electrical Systems
Plumbing and electrical upgrades often require permits and inspections. Check your local building department before starting, most jurisdictions require permits for any plumbing relocation, new circuits, or work near water. Don’t skip this: inspectors catch code violations (like improper slope on drain lines or undersized wiring) that could cause fires, leaks, or system failure later.
For plumbing, verify the size of supply lines (typically 1/2-inch copper or PEX) and drain lines (2-inch for toilet, 1.5-inch for sink, 2-inch minimum for tub/shower). If moving a toilet more than a few feet, you may need to pitch the 3-inch or 4-inch vent line toward the stack (main drain pipe). A general rule: drain lines slope 1/4 inch per foot downhill. Use a laser level or 4-foot level to check slopes after rough-in.
Electrical work near water demands GFCI (ground-fault circuit-interrupter) protection on all outlets within 6 feet of a sink, tub, or shower. Most codes now require two 20-amp circuits in bathrooms, one for lights and exhaust, one for the heater and outlets. If you’re wiring yourself, pull a permit and have the work inspected. If you’re unsure, hire a licensed electrician: electrical mistakes are not forgiving. Verify your outlet boxes are rated for wet locations if installed near moisture.
Run ventilation ductwork to the exterior before closing walls. A typical bathroom needs an 80–110 CFM (cubic feet per minute) exhaust fan for a 5×8 room. Undersized vents don’t remove humidity, causing mold. Route ducts outside with a damper flapper, never into an attic or crawlspace.
Install New Fixtures and Finishes
With plumbing and electrical rough-in complete and inspected, install your new fixtures. Mount the toilet flange (the ring that anchors the toilet base to the floor) at the correct height, then sit and bolt the new toilet. Reconnect water supply and test for leaks. Apply a bead of caulk (not grout) around the base for water-shedding: this allows flexibility as the home settles.
For the vanity, secure it to wall studs with bolts or heavy-duty brackets. Connect hot and cold supply lines (use flexible braided supply lines rated for your line size, typically 1/2-inch) and connect the drain to the P-trap. Tighten connections hand-tight plus a quarter turn: over-tightening strips threads.
Install shower or tub walls with cement board as your substrate, then tile or install a prefab acrylic surround. Tile work demands patience: back-butter each tile (apply thin-set mortar to the back of the tile), leave consistent grout joints (typically 1/8 to 1/4 inch), and slope the shower floor toward the drain at a minimum of 1/4 inch per foot. Grout within 24–48 hours after tile sets, then seal grout on horizontal surfaces to prevent water intrusion.
For flooring, options range from large-format porcelain tile (easy to clean, hides grout lines, 12×24 inches or larger) to vinyl plank flooring (warm underfoot, water-resistant, faster install). Both work well in bathrooms if properly sealed and detailed at transitions. Lay flooring last, after walls and fixtures.
Add Finishing Touches and Ventilation
Paint walls with bathroom-grade semi-gloss or satin enamel, matte finishes hold moisture and encourage mildew. Prime any new drywall with a primer-sealer first. Two coats of quality paint in a light or neutral color opens the space and hides imperfections.
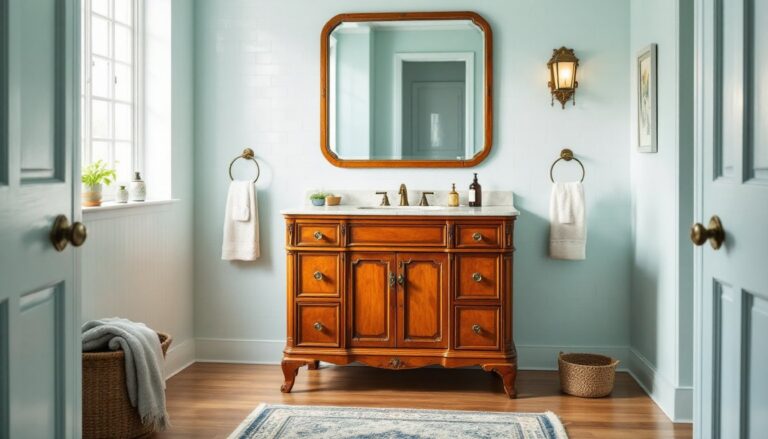
Install trim and hardware. Caulk gaps between tile and tub lips, cabinet bases, and wall joints with 100% silicone caulk (not acrylic), which stretches and resists mold. Paint or stain wood trim, install baseboards with finish nails, and add a fresh mirror with proper mounting brackets.
Install light fixtures and exhaust fan. Mount vanity lights symmetrically on either side of the mirror at eye level (typically 60–66 inches from floor to center). Install the exhaust fan before the drywall patch overhead if you hadn’t already. Ductwork and damper should be complete. Run the fan on a timer or moisture sensor to run 20–30 minutes after showers, reducing humidity.
Treatment resources like Remodelista’s design guides and Bob Vila’s renovation advice offer inspiration and tips for choosing finishes and avoiding common pitfalls. Do a final walk-through: Check for leaks under the sink and around fixtures. Verify GFCI outlets trip when tested. Confirm ventilation runs to the exterior, not into walls. Schedule final inspections if required by your municipality. Once everything is inspected and sealed, your remodel is complete, enjoy a fully functional, updated bathroom.