A wood range hood can transform your kitchen from purely utilitarian to genuinely inviting. Unlike stainless steel or glass alternatives, a quality wood hood adds warmth, character, and a custom-built feel that aligns with your cabinetry and décor. Whether you’re drawn to a rustic farmhouse aesthetic, modern minimalist lines, or transitional styling, wood range hoods work harder than most people realize, they manage cooking odors and steam while making a design statement. This guide covers what makes a wood range hood worth considering, which types suit your kitchen layout, how to pick the right wood and finish, the honest details about installation and upkeep, and how to integrate one seamlessly into your space.
Table of Contents
ToggleKey Takeaways
- A wood range hood combines ventilation functionality with aesthetic appeal, adding warmth and character to your kitchen while managing cooking odors and steam effectively.
- Choose durable wood types like alder, hickory, maple, or cherry and invest in a catalyzed lacquer or conversion varnish finish to resist grease, moisture, and kitchen humidity.
- Proper installation requires securing the hood to solid backing (not drywall alone), running ductwork to the exterior, and hiring a licensed electrician for dedicated wiring.
- Wood range hoods demand regular maintenance—monthly exterior wiping, filter replacement every 1–3 months, and periodic touch-ups to the finish—making them a long-term commitment.
- Match your wood hood’s stain color, proportions, and hardware finish to your cabinetry and overall kitchen style, ensuring it enhances rather than overwhelms your space.
- Oversized or undersized wood range hoods disrupt visual balance; extend the hood 3–6 inches beyond your cooktop width and pair it with warm LED lighting (2700K) to complement the wood finish.
What Is a Wood Range Hood and Why Consider One?
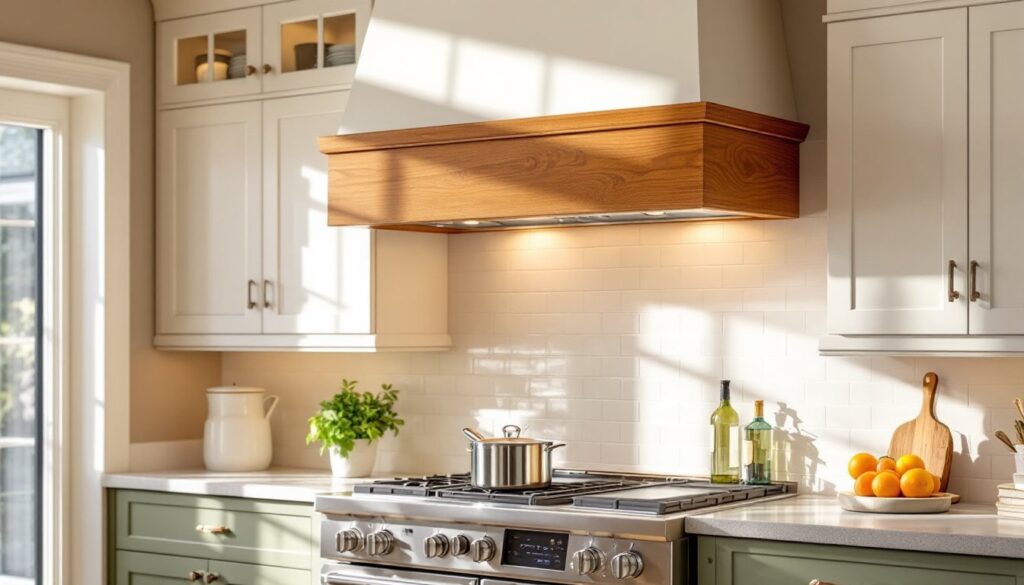
A wood range hood is a ventilation unit, typically mounted above your stovetop, constructed primarily from wood or featuring wood as the dominant visible material. It houses the blower motor, ductwork, and filters while presenting a finished aesthetic that matches or complements your kitchen cabinets. The hood captures cooking fumes, grease particles, and moisture, either venting them outside (ductwork) or recirculating filtered air back into the kitchen (ductless units).
Why choose wood? Durability tops the list when properly sealed and finished. Wood harmonizes with nearly any design language, shaker, slab, raised-panel, or flat-front cabinet doors. It won’t show fingerprints like stainless steel and feels warmer than cold metals. Cost sits somewhere between budget options and high-end custom stainless units. The downside: wood requires periodic touch-ups, responds to humidity and temperature swings, and demands more careful cleaning than non-porous materials. If your kitchen runs humid or you’re prone to grease splatter, you’ll need a finish that can handle it.
Types of Wood Range Hoods
Wood range hoods come in several functional and aesthetic configurations. Ducted (externally vented) hoods pull cooking air through ductwork to the outside, the gold standard for odor and moisture removal, though it requires framing or running ducts through walls, ceilings, or soffits. Ductless (recirculating) hoods pull air through filters and return it to the kitchen: they’re easier to install but less effective at removing steam and require frequent filter changes.
Under-Cabinet and Island Styles
The wood under-cabinet range hood mounts directly to cabinetry or the wall above your stovetop, fitting snugly into the space and aligning with your cabinet run. These are the most common choice for standard kitchen layouts and offer a clean, integrated look. They typically sit 24 to 30 inches above the cooktop (check your hood and appliance specs, as this varies).
The wood hood range for island cooktops is a different beast, it hangs from the ceiling and must accommodate ductwork running upward, making it more visible architecturally. Island hoods demand more careful design since they’re seen from multiple angles. A wood under cabinet range hood works better for perimeter kitchens: an island hood works best when you want the wood element to be a focal point, not hidden.
Size ranges from compact 36-inch units (common for smaller kitchens or secondary cooktops) to 48-inch and larger. Measure your cooktop width and add 3 to 6 inches on each side for proper capture. Confirm the hood’s CFM (cubic feet per minute) rating matches your cooktop, typically 400 CFM minimum for electric, 600+ for gas.
Choosing the Right Wood Type and Finish
Wood selection affects both longevity and appearance. Alder, hickory, maple, and cherry are popular choices, they’re stable, readily available, and take stain and paint well. Softer woods like pine are cheaper but dent easily in a kitchen environment. Plywood with veneer is common in mid-range units: it’s stable and economical, though edge banding requires careful finishing.
Finish matters enormously. A catalyzed lacquer or conversion varnish provides a durable, wipeable surface that resists grease and moisture, far better than wipe-on polyurethane. If choosing a painted hood (white, gray, custom color), use an oil-based primer and enamel paint or a conversion finish: water-based finishes don’t hold up well to kitchen humidity and heat. For stained finishes, seal the wood with a spar urethane or marine-grade varnish to handle steam and grease splatter.
Matte and satin finishes hide dust and fingerprints better than gloss, though gloss is easier to wipe clean. Be realistic: all wood finishes yellow slightly over years of kitchen heat and need periodic refreshing. If you’re not prepared to refinish or repaint every 5 to 7 years, choose a finish that ages gracefully or opt for a non-wood hood.
Installation and Maintenance Essentials
Installation complexity depends on whether you’re installing a pre-made unit or building custom. Pre-fab wood hoods (from cabinet makers or manufacturers) often slot into existing cabinet openings and require only ductwork connection, electrical work, and fastening, doable for a handy homeowner with basic carpentry and electrical skills. Building a custom wood hood is an advanced project: it involves framing, running ductwork, wiring a motor and controls, and finish carpentry. Most builders hire professionals for the framing and venting: only advanced DIYers tackle the whole job.
Key installation steps: Confirm your cooktop is in final position. Mark stud locations and ensure the hood will mount securely (a typical hood weighs 60 to 100 pounds and must be anchored to solid backing, not drywall alone). Run ductwork to the exterior before or during hood installation. Hire a licensed electrician to wire the hood to a dedicated 120V circuit with a switch. Seal all gaps and seams with caulk rated for kitchens (silicone or acrylic-latex blend) to prevent moisture infiltration. Use **stainless fasteners (not steel, which rusts) and avoid over-tightening wood screws, they split the material.
Maintenance is straightforward but regular. Wipe down the exterior monthly with a damp cloth and mild detergent: dry immediately to prevent water spots. Replace or clean filters every 1 to 3 months depending on cooking frequency. Inspect the wood finish yearly for damage or wear: touch up nicks with matching stain or paint. Ductwork should be visually inspected annually and cleaned if grease buildup accumulates. A clear silicone caulk joint around the hood and wall should be resealed every 2 to 3 years.
Design Integration and Kitchen Aesthetics
A wood range hood succeeds when it echoes or complements your cabinet doors, hardware, and overall kitchen style. Match the stain color and grain direction to your base and wall cabinets for a cohesive run. If your cabinets are painted, paint the hood the same color (or a coordinating shade) and use the same hardware finish, knobs or pulls tie the spaces together visually.
The hood’s proportions matter. An oversized hood above a compact cooktop looks clunky: an undersized hood above a 48-inch range looks inadequate. Ideally, the hood extends 3 to 6 inches beyond the cooktop on each side and sits at a height that’s visually balanced with upper cabinets, not too high (disconnected) or too low (overwhelming). If you’re pairing a wood hood with an island cooktop, consider the sight lines from the dining or living area: a well-proportioned hood becomes an architectural feature, while a poorly scaled one dominates the space awkwardly.
Discover design inspiration by browsing real-kitchen examples on Houzz’s collection of 75 wood range hood ideas to see how different woods, finishes, and island vs. under-cabinet styles perform in actual homes. Kitchen design platforms like The Kitchn offer styling advice on integrating range hoods with your broader kitchen aesthetic. If you’re building custom, detailed construction guidance walks through framing, motor installation, and finish carpentry step-by-step.
Finally, lighting matters. Many wood hoods include recessed or pendant lights beneath for task lighting over the cooktop. Warm LED bulbs (2700K color temperature) complement wood and create an inviting ambiance: harsh cool white (5000K) can make a warm wood hood look cold and clinical.
Conclusion
A wood range hood marries function with design appeal, it’s ventilation equipment that looks and feels like part of your kitchen. Choose durable wood types, commit to a finish that stands up to moisture and heat, understand whether you’re installing a prefab unit or going full custom, and align the hood’s proportions and stain color with your cabinetry. With proper installation, regular maintenance, and thoughtful design integration, a wood range hood can last 15+ years while adding genuine character to your space.