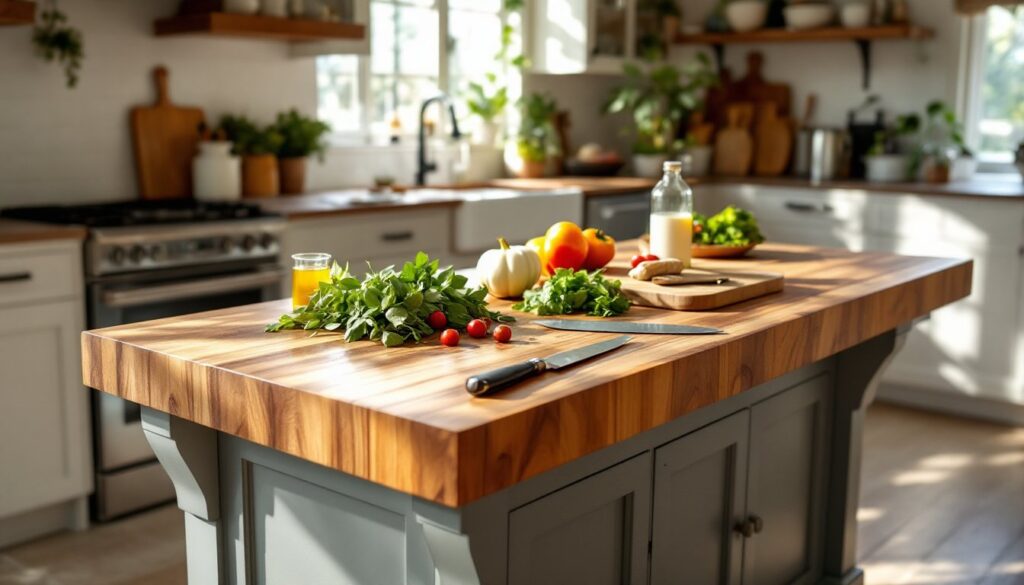
A butcher block kitchen island brings warmth, functionality, and a timeless aesthetic to any kitchen. Unlike slick laminate or cold granite, butcher block offers a natural wood surface that’s both beautiful and practical for meal prep, casual dining, and storage. Whether you’re planning a full kitchen renovation or adding a focal point to your existing space, understanding the ins and outs of butcher block, from wood selection to maintenance, ensures your investment lasts for years. This guide walks you through everything a DIYer needs to know to choose, install, and care for a butcher block island that works as hard as it looks good.
Table of Contents
ToggleKey Takeaways
- A butcher block kitchen island combines durability, warmth, and affordability, offering a natural wood surface that’s gentler on knives and more budget-friendly than granite or marble alternatives.
- Wood species selection is critical: hard maple is the most durable for heavy-duty prep, oak adds character with visible grain, walnut delivers aesthetic beauty, and bamboo offers eco-friendly sustainability.
- Proper installation requires acclimating the butcher block for 48 hours, ensuring a level base, and using figure-eight fasteners or pocket-hole screws rather than glue to allow for natural wood movement.
- Consistent maintenance with food-grade mineral oil applied monthly for the first three months, then quarterly, is essential to protect your investment and prevent premature failure.
- Daily care including immediate spill cleanup, using cutting boards for food prep, and protecting against heat and acidic foods preserves the wood’s beauty and extends the island’s lifespan for decades.
Why Butcher Block Remains a Kitchen Island Favorite
Butcher block has made a serious comeback in kitchen design, and for good reason. The material offers a unique blend of durability, aesthetic appeal, and affordability compared to premium countertop alternatives like marble or quartz. A butcher block surface has character, visible wood grain, natural color variation, and a tactile warmth that engineered materials simply can’t replicate.
From a practical standpoint, butcher block excels for food prep. The wood fibers naturally resist knife marks better than plastic or metal surfaces, and it’s gentle on knife edges. It’s also quieter than stone, no loud clanging of pots, and stands up well to the wear and tear of a busy kitchen island where you’re chopping, mixing, and serving all day.
The cost factor matters too. A quality butcher block top typically runs a fraction of the price of granite or marble, making it accessible for homeowners who want a premium look without premium pricing. Whether you’re building a custom island from scratch or upgrading an existing one, butcher block delivers impact per dollar. A curated collection of butcher block kitchen island designs shows how designers leverage this material in everything from farmhouse to modern minimalist kitchens.
Choosing the Right Butcher Block Material and Wood Type
Not all butcher block is created equal. The wood species, construction method, and finish grade dramatically affect durability, appearance, and maintenance demands. Before buying, understand the differences so you pick a top that matches your kitchen’s style and your willingness to maintain it.
Popular Wood Options and Their Characteristics
Hard maple is the traditional choice for food-service counters and butcher blocks. It’s dense, tight-grained, and naturally resistant to bacteria. Maple has a pale, consistent color that darkens slightly with age and use. It’s tough enough for heavy chopping and stands up to the repeated scarring that comes with knife work. Hard maple costs more upfront but lasts longer than softer woods.
Oak offers a dramatic grain pattern and warm, honey tones. It’s less dense than maple, so it shows knife marks more readily, something some folks embrace as character. Oak is easier on your wallet but requires more attentive maintenance. If you love the look of visible grain and don’t mind a lived-in appearance, oak works well.
Walnut is the aesthetic choice. Deep chocolate-brown color with striking grain makes any island a showpiece. But, walnut is softer than maple and more prone to denting and scratching. If your primary goal is beauty over durability, walnut delivers. Be prepared to oil and sand more frequently.
Bamboo is a sustainable, harder-than-hardwood option that resists bacteria naturally. It has a pale, sometimes striped appearance and costs less than maple. Bamboo works especially well in modern kitchens and appeals to environmentally conscious homeowners. It’s also slightly more water-resistant than traditional hardwoods.
When shopping, confirm whether the butcher block is edge-grain (individual pieces glued side-by-side) or face-grain (wider boards stacked). Edge-grain is traditional and more durable for food prep: face-grain is often cheaper but less resistant to knife marks. Check product specifications and ask suppliers about wood origin, oil type, and warranty coverage. A gallery of professional and user-submitted photos showcasing butcher block island designs provides real-world examples of different wood types in various kitchens.
Installation and Preparation Tips for DIY Success
Installation difficulty depends on whether you’re adding a butcher block top to an existing island base or building the whole thing. Either way, thorough prep work separates a solid, long-lasting install from one that fails within a few years.
First, let your butcher block acclimate to your kitchen’s humidity and temperature for 48 hours before installation. Wood moves, it expands and contracts with seasonal changes. If you install immediately after delivery, you risk cupping, warping, or gaps as the wood adjusts. Store it flat indoors in the room where it’ll live.
Measuring, Positioning, and Anchoring Your Island
Measure your island base carefully. Butcher block tops are heavy, expect 100 to 150+ pounds depending on thickness and size, so you need a solid, level base. Use a 4-foot level to confirm the island cabinet is plumb and level in all directions. Shim the base with shims or adjustable feet if needed: a crooked foundation leads to gaps, rocking, and wood stress.
Position the butcher block on the base and check fit. Most tops aren’t cut to exact measurements: plan for an overhang of 10 to 12 inches on each long side and 6 to 8 inches on the short sides (adjust based on your footrest preference). Overhang adds visual interest and legroom for seating.
Anchor the top using figure-eight fasteners or pocket-hole screws into the cabinet frame from underneath. Do not glue the top down or use traditional nails, the wood needs to move with humidity changes. Pocket holes are cleaner: drill them at a slight angle into the underside of the island framing, then drive coarse wood screws through. Space fasteners 12 inches apart around the perimeter. Leave one side loose initially so you can access the fastening mechanism later if needed.
If your island sits on a kitchen island base with a hollow core or particleboard top, reinforce the mounting surface. Plywood strips or a 3/4-inch plywood substrate underneath the butcher block distribute weight better than relying solely on hollow cabinet walls. This prevents deflection, squeaking, and accelerated wood damage.
Sealing, Maintenance, and Long-Term Care
How you treat your butcher block from day one determines its lifespan and appearance. Most new butcher blocks arrive pre-oiled with food-grade mineral oil. Don’t skip conditioning, it fills the wood grain, darkens the color slightly, and provides water resistance.
Initial oiling: Apply a food-safe mineral oil (never linseed oil, which can go rancid) with a lint-free cloth in the direction of the grain. Work section by section, letting the oil soak in for 5 to 10 minutes, then buff away excess with a clean cloth. Repeat monthly for the first three months, then quarterly year-round. Consistency matters: many premature failures happen because owners oil sporadically or skip it altogether.
For enhanced water resistance, some finishes combine mineral oil with beeswax or other natural waxes. These products build up over time and add a subtle sheen. Apply thin coats and buff thoroughly. Avoid heavy polyurethane or lacquer, these create a plastic-like appearance, interfere with the wood’s breathing, and eventually chip or peel.
Daily care is simple: Wash spills immediately with a damp cloth and mild soap, then dry. Don’t let water pool or sit. Avoid prolonged contact with acidic foods (citrus, vinegar, wine) on unsealed wood: they can bleach or stain. Use cutting boards for chopping and high-impact prep. Trivets or hot pads protect against hot pans and pots, direct heat causes discoloration and can crack the wood.
Address problems early. Light surface stains often fade with oiling. Deeper burns, gashes, or persistent moisture issues may require light sanding (150-grit sandpaper) followed by re-oiling. For major damage, professional refinishing is worth the cost, it’s far cheaper than replacing the whole top.
A kitchen design guide from The Kitchn offers additional insights on small kitchen solutions and maintaining natural wood surfaces in active cooking spaces. Seasonal checks are worth a few minutes: inspect for gaps, movement, or finish deterioration. Humidity control in your home (a dehumidifier in summer, proper ventilation in winter) keeps wood stable and happy.
Conclusion
A butcher block kitchen island is an investment that pays dividends in both function and beauty. With the right wood species, proper installation, and consistent maintenance, your island will be a centerpiece your kitchen for decades. The key is managing expectations, butcher block does develop a patina, shows knife marks, and requires oiling, and viewing those as proof of a well-loved workspace, not flaws. Start with the wood type that matches your style, install it correctly the first time, and stick to a simple oil schedule. Your hands-on care transforms a nice piece of furniture into a kitchen heirloom.